在开始之前简单阐述下lamp架构:
Linux+Apache+Mysql+Perl/PHP/Python一组常用来搭建动态网站或者服务器的开源软件,本身都是各自独立的程序,但是因为常被放在一起使用,拥有了越来越高的兼容度,共同组成了一个强大的Web应用程序平台。
从网站的流量上来说,70%以上的访问流量是LAMP来提供的,LAMP是最强大的网站解决方案.想深入了解可自行Google之~
开始:
我个人比较喜欢redhat系统,像ubuntu企业版、debian、BSD之类的没怎么用。建议大家只研究好一种版本的系统即可,否则学的多了学不精!其次我喜欢yum安装软件,比起繁琐的源代码编译过程简单过了,可以略过复杂的依赖关系,源代码方式大家可自行Google研究之~
[root@localhost ~]# uname -a
Linux localhost.localdomain 2.6.18-194.el5 #1 SMP Tue Mar 16 21:52:39 EDT 2010 x86_64 x86_64 x86_64 GNU/Linux
为测试时不出现必要的麻烦,先暂时关闭防火墙及Selinux,等熟悉后大家再开启。
[root@localhost ~]# service iptables stop //关闭iptables防火墙
[root@localhost ~]# setenforce 0 //临时关闭selinux
安装php环境:
[root@localhost ~]# yum install -y httpd php php-mysql mysql-server
httpd //apache服务器 php//php主程序 php-mysql//连接mysql数据库组件 mysql-server//mysql数据库主服务
重启apache、mysql服务,初始化mysql数据库、并且将其加为开机自启动:
[root@localhost ~]# service httpd restart && chkconfig httpd on && service mysqld restart && chkconfig mysqld on
停止 httpd: [失败]
启动 httpd: [确定]
停止 MySQL: [失败]
初始化 MySQL 数据库: Installing MySQL system tables…
OK
Filling help tables…
OK
To start mysqld at boot time you have to copy
support-files/mysql.server to the right place for your system
PLEASE REMEMBER TO SET A PASSWORD FOR THE MySQL root USER !
To do so, start the server, then issue the following commands:
/usr/bin/mysqladmin -u root password ‘new-password’
/usr/bin/mysqladmin -u root -h localhost.localdomain password ‘new-password’
Alternatively you can run:
/usr/bin/mysql_secure_installation
which will also give you the option of removing the test
databases and anonymous user created by default. This is
strongly recommended for production servers.
See the manual for more instructions.
You can start the MySQL daemon with:
cd /usr ; /usr/bin/mysqld_safe &
You can test the MySQL daemon with mysql-test-run.pl
cd mysql-test ; perl mysql-test-run.pl
Please report any problems with the /usr/bin/mysqlbug script!
The latest information about MySQL is available on the web at
http://www.mysql.com
Support MySQL by buying support/licenses at http://shop.mysql.com
[确定]
启动 MySQL: [确定]
[root@localhost ~]#
我们可以看到启动httpd mysql服务成功,现在测试php环境是否成功:
[root@localhost ~]# cd /var/www/html/ //apache网站根目录
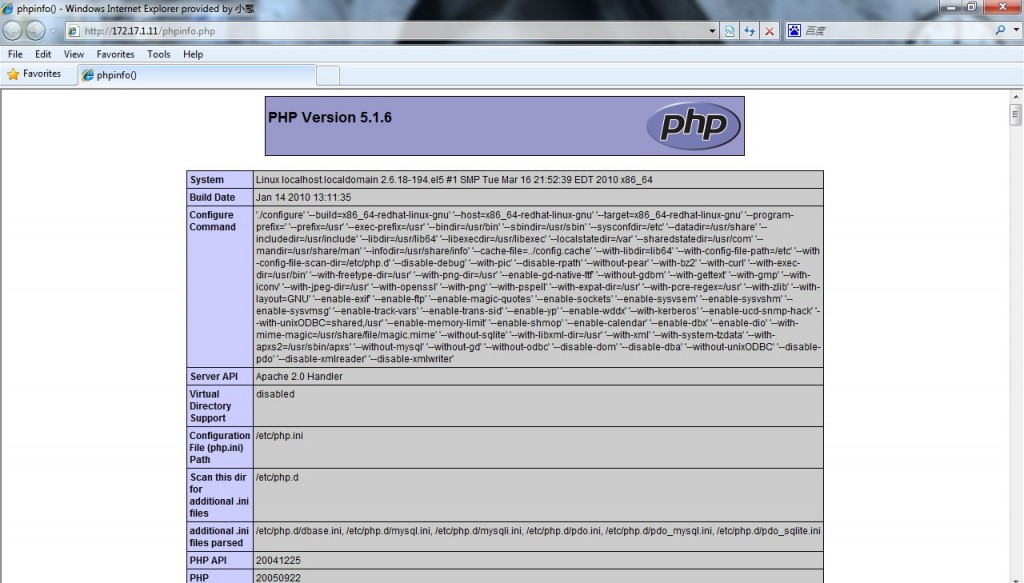
[root@localhost html]# vi phpinfo.php //创建php环境测试页
代码:
<? phpinfo(); ?>
保存退出,访问测试:

看到上面信息表示php环境可以运行了。
下面修改下mysql的密码,默认mysql的用户名为root密码为空,这样是不安全的,修改root密码:
[root@localhost ~]# mysql -u root -p
Enter password:
Welcome to the MySQL monitor. Commands end with ; or \g.
Your MySQL connection id is 2
Server version: 5.0.77 Source distribution
Type ‘help;’ or ‘\h’ for help. Type ‘\c’ to clear the buffer.
mysql>
mysql> use mysql; //切换数据库
Reading table information for completion of table and column names
You can turn off this feature to get a quicker startup with -A
Database changed
mysql> update user set password=PASSWORD(‘123′) where user=’root’; //更改root密码为123
Query OK, 3 rows affected (0.07 sec)
Rows matched: 3 Changed: 3 Warnings: 0
mysql>
下面用个实例看一下,安装discuz论坛:
将discuz安装程序目录upload放到/var/www/html/下
修改upload目录中相关目录权限:
Discuz需要以下这些目录及文件需要可读写权限
./config.inc.php
./templates
./attachments
./forumdata
./forumdata/cache
./forumdata/templates
./forumdata/threadcaches
./forumdata/logs
./uc_client/data/cache/

在浏览器中输入:http://172.17.1.11/upload/install/根据提示进行安装,在此就不再截图了,注意下配置mysql数据库的时候注意填写刚才修改的密码。其他根据情况填写直至安装完成后跳转到论坛首页。
下面看下apache的住配置文件httpd.conf:
[root@localhost ~]# vi /etc/httpd/conf/httpd.conf
简单的说下配置含义
ServerRoot “/etc/httpd” //apache程序主目录
PidFile run/httpd.pid //pid文件路径
Timeout 120 //超时
KeepAlive Off //保持一直连接
MaxKeepAliveRequests 100
KeepAliveTimeout 15
<IfModule prefork.c>
StartServers 8
MinSpareServers 5
MaxSpareServers 20
ServerLimit 256
MaxClients 256
MaxRequestsPerChild 4000
</IfModule>
以上都是性能优化,可以参考下apache文档:
https://www.rootop.org/ApacheManual/Apache2.2_zh_CN/
Listen 80 //监听端口 web服务器都是工作在80端口
Include conf.d/*.conf //加载conf.d下的所有.conf配置文件
DocumentRoot “/var/www/html” //网站的根目录
#NameVirtualHost *:80 //以下是虚拟主机的配置。我们大部分用的是基于域名的虚拟主机
#
# NOTE: NameVirtualHost cannot be used without a port specifier
# (e.g. :80) if mod_ssl is being used, due to the nature of the
# SSL protocol.
#
#
# VirtualHost example:
# Almost any Apache directive may go into a VirtualHost container.
# The first VirtualHost section is used for requests without a known
# server name.
#
#<VirtualHost *:80>
# ServerAdmin webmaster@dummy-host.example.com
# DocumentRoot /www/docs/dummy-host.example.com
# ServerName dummy-host.example.com
# ErrorLog logs/dummy-host.example.com-error_log
# CustomLog logs/dummy-host.example.com-access_log common
#</VirtualHost>
大家可自行搜索本博客下的虚拟主机配置文章。
php的配置文件位于/etc/php.ini
大部分配置都有相关的解释:
extension_dir = “/usr/lib64/php/modules” //php模块路径
display_errors = Off //打开错误调试,开发比较实用
; Whether to allow HTTP file uploads.
file_uploads = On //允许上传
#extension=msql.so //注意下这个部分,在我们编译进php需要的模块时候,需要在此加载,比如比较常用的json.so模块。
; Temporary directory for HTTP uploaded files (will use system default if not
; specified).
;upload_tmp_dir =
; Maximum allowed size for uploaded files.
upload_max_filesize = 2M //上传大小
简单说这些,大家可Google之~
mysql的住配置文件:
[root@localhost ~]# vi /etc/my.cnf //主配置文件
默认的配置文件比较简单
[mysqld]
datadir=/var/lib/mysql //mysql程序目录
socket=/var/lib/mysql/mysql.sock
user=mysql
# Default to using old password format for compatibility with mysql 3.x
# clients (those using the mysqlclient10 compatibility package).
old_passwords=1
# Disabling symbolic-links is recommended to prevent assorted security risks;
# to do so, uncomment this line:
# symbolic-links=0
[mysqld_safe]
log-error=/var/log/mysqld.log
pid-file=/var/run/mysqld/mysqld.pid
在mysq安装好后会有几个根据数据库运行大小有几个不同的配置文件,主要是性能方面配置的不同:
[root@localhost ~]# cd /usr/share/mysql/
[root@localhost mysql]# ll
-rw-r–r– 1 root root 4972 2010-01-30 my-huge.cnf
-rw-r–r– 1 root root 20970 2010-01-30 my-innodb-heavy-4G.cnf
-rw-r–r– 1 root root 4948 2010-01-30 my-large.cnf
-rw-r–r– 1 root root 4955 2010-01-30 my-medium.cnf
-rw-r–r– 1 root root 2526 2010-01-30 my-small.cnf
先简单写到这儿,等想到了再补充。


