Rootop 服务器运维与web架构

2013-03-21
发表者 Venus
暂无评论

vsftpd 虚拟用户 的实现

[root@rhel6www ~]# rpm -qa | grep vsftpd
vsftpd-2.2.2-6.el6_0.1.i686
[root@rhel6www ~]# yum install -y vsftpd

[root@rhel6www ~]#useradd -s /sbin/nologin vuser    //首先创建一个用户,用来将虚拟用户映射为系统账户

建立一个虚拟用户文档:
[root@rhel6www vsftpd]# cat vuser
venus
venus
一行用户名一行密码,多个用户往下按序排列。
[root@rhel6www vsftpd]# db_load -T -t hash -f /etc/vsftpd/vuser /etc/vsftpd/vuser.db    //生成db文件
编辑vsftpd.conf添加:

guest_enable=yes                     //启用虚拟用户
guest_username=vuser             //映射为的系统账户
pam_service_name=vsftpd        //指定pam认证文件
user_config_dir=/etc/vsftpd/user_config    //在user_config下创建各个虚拟用户自身的配置文件(不同用户不同权限,所以使用独自配置文件)

###被动模式及端口####
pasv_enable=YES
pasv_min_port=30000
pasv_max_port=30100
###被动模式####

配置pam:
[root@rhel6www vsftpd]# vi /etc/pam.d/vsftpd

将已有的内容屏蔽,添加两行:
auth          required /lib/security/pam_userdb.so db=/etc/vsftpd/vuser
account     required /lib/security/pam_userdb.so db=/etc/vsftpd/vuser

(上面地方特别注意,系统如果为64位,那么需要把lib改为lib64)

创建虚拟用户配置文件:
[root@rhel6www vsftpd]# mkdir /etc/vsftpd/user_config
[root@rhel6www vsftpd]#vi /etc/vsftpd/user_config/venus    //配置文件要同名与用户名
添加:

local_root=/var/ftp/pub/venus         //指定家目录
download_enable=yes                          //下载
anon_upload_enable=yes                    //上传
anon_mkdir_write_enable=yes         //创建文件夹
anon_other_write_enable=yes           //可删除文件
local_umask=022
anon_umask=022
file_open_mode=0755

[root@rhel6www ~]# chown -R vuser:vuser /var/ftp/pub/*      //赋予家目录vuser属主属组,否则会没权限无法上传

启用了防火墙,需要修改iptables配置文件,放行被动端口:
[root@rhel6www ~]# vi /etc/sysconfig/iptables
添加:
-A INPUT -m state –state NEW -m tcp -p tcp –dport 21 -j ACCEPT
-A INPUT -m state –state NEW -m tcp -p tcp –dport 30000:30100 -j ACCEPT
保存重启iptables。测试。

2013-03-20
发表者 Venus
暂无评论

Office 2007打开word显示配置 Microsoft office professional plus

安装完office2007后打开word提示配置 显示配置 Microsoft office professional plus ,每次都提示,重装office依旧。Google~

点击开始-运行,或者直接 windows徽标键+R 键入:

Office 2003:
reg add HKCU\Software\Microsoft\Office\11.0\Word\Options /v NoReReg /t REG_DWORD /d 1
Office 2007:
reg add HKCU\Software\Microsoft\Office\12.0\Word\Options /v NoReReg /t REG_DWORD /d 1
另外可以删除setup安装文件,让提示安装的时候找不到文件从而无法启动配置。
在 C:\Program Files\Common Files\microsoft shared\OFFICE12\Office Setup Controller 下有个setup.exe 改名即可。

2013-03-18
发表者 Venus
暂无评论

解决 cannot find freeTDS in known installation directories 及 spprintf.h:40: note: expected ‘char **’ but argument is of type ‘unsigned char 错误

编译安装mssql模块提示错误:

cannot find freeTDS in known installation directories

看错误提示说是找不到freetds,安装freetds。当前版本为freetds-0.91


[root@mail ~]#wget -c ftp://ftp.freetds.org/pub/freetds/stable/freetds-stable.tgz
[root@mail freetds-0.91]# ./configure --prefix=/usr/local/freetds --with-tdsver=7.1
有的资料说是8.0 可是帮助里没有8.0版本,或者直接省略此参数--with-tdsver
[root@mail freetds-0.91]#make && make install

其实安装完freetds,编译mssql的时候这里出现了一个bug。编译报错:

/root/soft/php-5.3.3/ext/mssql/php_mssql.h:68: error: redefinition of typedef ‘LPBYTE’
/usr/local/freetds//include/sqlfront.h:36: note: previous declaration of ‘LPBYTE’ was here
/root/soft/php-5.3.3/ext/mssql/php_mssql.c: In function ‘php_mssql_do_connect’:
/root/soft/php-5.3.3/ext/mssql/php_mssql.c:760: warning: cast from pointer to integer of different size
/root/soft/php-5.3.3/ext/mssql/php_mssql.c: In function ‘php_mssql_get_column_content_without_type’:
/root/soft/php-5.3.3/ext/mssql/php_mssql.c:1105: warning: passing argument 1 of ‘spprintf’ from incompatible pointer type
/usr/include/php/main/spprintf.h:40: note: expected ‘char **’ but argument is of type ‘unsigned char **’
make: *** [php_mssql.lo] Error 1

在这里需要修改freetds源码,修改文件 freetds-0.91/include/sqlfront.h
找到 typedef       BYTE *  LPBYTE;  将其注释掉
/* typedef       BYTE *  LPBYTE; */

删除掉/usr/local/freetds后,重新编译安装 freetds 后再次编译mssql。


[root@mail mssql]# ./configure --with-mssql=/usr/local/freetds && make && make install

模块位于/usr/lib64/php/modules/下。配置php.ini加载即可。

2013-03-15
发表者 Venus
暂无评论

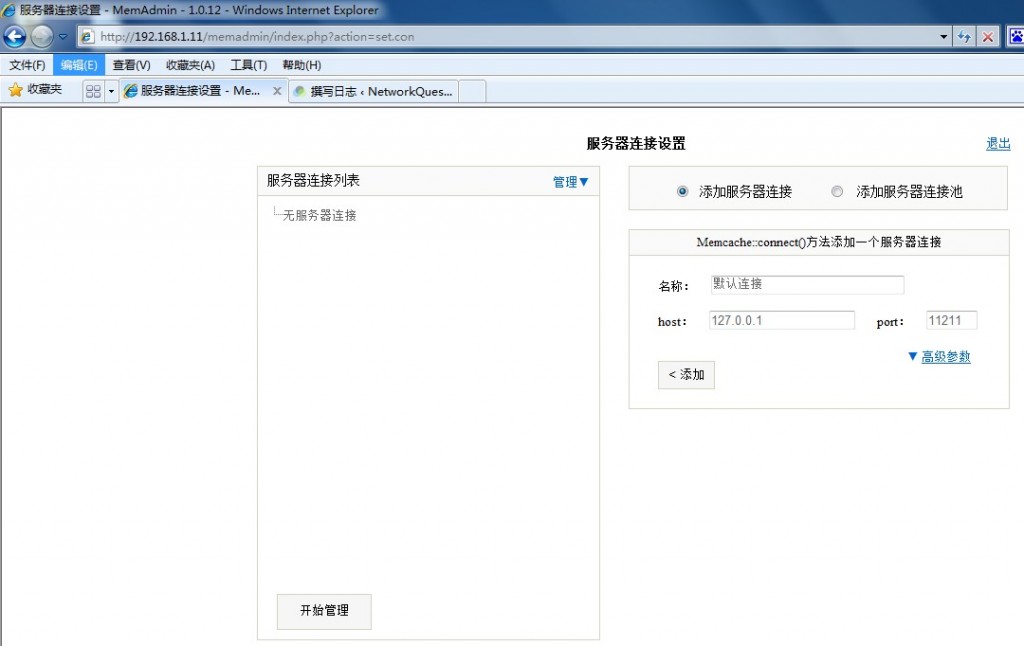
利用memadmin通过web管理memcached

memadmin是一个web管理memcached的php程序,简单易用。
下载地址:
wget -c http://www.junopen.com/memadmin/memadmin-1.0.12.tar.gz
放到服务器上,访问报错:

PHP未安装Memcache扩展
The memcache extension for PHP must be loaded first

这是没有安装memcache模块,在php的拓展包中也没有,属于第三方,可以从 http://pecl.php.net/package/memcache 找到下载。
[root@rhel6www ~]#wget -c http://pecl.php.net/get/memcache-2.2.7.tgz

memcache需要phpize命令生成配置信息等,但是redhat6.0中已经没有php-devel包了,需要单独下载,安装。
[root@rhel6www ~]# wget -c ftp://bo.mirror.garr.it/pub/1/slc/slc60beta/i386/Packages/php-devel-5.3.2-6.el6.i686.rpm
[root@rhel6www ~]# yum install autoconf automake
[root@rhel6www ~]# rpm -ivh php-devel-5.3.2-6.el6.i686.rpm

[root@rhel6www ~]# cd memcache-2.2.7
[root@rhel6www memcache-2.2.7]# phpize
Configuring for:
PHP Api Version:         20090626
Zend Module Api No:      20090626
Zend Extension Api No:   220090626
[root@rhel6www memcache-2.2.7]# ./configure && make && make install

根据make install 最后的提示,确认memcache.so模块的安装路径,将其复制到/usr/lib/php/modules 中,在32位系统下默认的php模块路径是/usr/lib/php/modules,如果是64位系统为/usr/lib64/php/modules,如果是源码编译,自行安装到相关路径。

编辑php.ini加载模块:
extension_dir = /usr/lib/php/modules    //模块路径
extension = memcache.so                     //模块名称

2013-03-15
发表者 Venus
暂无评论

Linux构建memcached加速web服务

libevent是一个事件触发的网络库,适用于windows、linux、bsd等多种平台,内部使用select、epoll、kqueue等系统调用管理事件机制。著名分布式缓存软件memcached也是libevent based,而且libevent在使用上可以做到跨平台,而且根据libevent官方网站上公布的数据统计,似乎也有着非凡的性能。

memcached官网下载:http://memcached.org/

[root@rhel6www ~]# rpm -qa | grep libevent
libevent-1.4.13-1.el6.i686

查看系统已经安装,但是在下面的编译过程中还需要libevent-devel,但是在rhel6.0以后没发现有此包,以后尽量使用centos,便于直接yum安装。
可以从http://rpm.pbone.net中寻找所需要的rpm包。
下载地址:
ftp://ftp.sunet.se/pub/Linux/distributions/scientific/6.0/i386/os/Packages/libevent-devel-1.4.13-1.el6.i686.rpm

这是编译memcached中出现的报错:
checking for libevent directory… configure: error: libevent is required.  You can get it from

http://www.monkey.org/~provos/libevent/

If it’s already installed, specify its path using –with-libevent=/dir/
这就是因为没有安装libevent-devel,安装,重新编译即可。

我这里将系统自带的libevent卸载,重新编译的。

[root@rhel6www ~]# wget -c https://github.com/downloads/libevent/libevent/libevent-2.0.21-stable.tar.gz
[root@rhel6www ~]#tar zxvf libevent-2.0.21-stable.tar.gz
[root@rhel6www ~]# cd libevent-2.0.21-stable
[root@rhel6www libevent-2.0.21-stable ~]# ./configure --prefix=/usr/local/libevent
[root@rhel6www libevent-2.0.21-stable ~]#make && make install
[root@rhel6www ~]# cd memcached-1.4.15
[root@rhel6www memcached-1.4.15]# ./configure --prefix=/usr/local/memcached --with-libevent=/usr/local/libevent
[root@rhel6www memcached-1.4.15]#make && make install
测试:
[root@rhel6www bin]# pwd
/usr/local/memcached/bin
[root@rhel6www bin]# ./memcached -d -u root -p 11211 -m 50 -P /tmp/memcached.pid

[root@rhel6www bin]# lsof -i:11211
COMMAND     PID USER   FD   TYPE DEVICE SIZE/OFF NODE NAME
memcached 21471 root   26u  IPv4  33972      0t0  TCP *:memcache (LISTEN)
memcached 21471 root   27u  IPv6  33973      0t0  TCP *:memcache (LISTEN)
memcached 21471 root   28u  IPv4  33976      0t0  UDP *:memcache
memcached 21471 root   29u  IPv6  33977      0t0  UDP *:memcache

已经运行了。

关闭进程:
[root@rhel6www ~]# kill -9 $(cat /tmp/memcached.pid)
加为开机启动,直接写到 /etc/rc.d/rc.local 即可。
可用参数:
-d 选项是启动一个守护进程
-m 是分配给Memcache使用的内存数量,单位是MB
-u 是运行Memcache的用户
-l 是监听的服务器IP地址
-p 是设置Memcache监听的端口
-c 选项是最大运行的并发连接数,默认是1024,按照服务器的负载设定
-P 是设置保存Memcache的pid文件

使用-h查看帮助。

然后编译memcache.so模块,加载到php中,参考:

https://www.rootop.org/pages/1662.html