#目的:
查找指定目录下的日志文件,超过指定大小后就清空
#方法:
find /tmp -size +500M -type f | grep *.log | xargs -I dellist sh -c 'cat /dev/null > dellist'
大部分命令只能在命令行输入参数,不能用管道符传递参数。
xargs命令就是把标准输入做为执行命令的参数。
-I 作用是指定要替换的字符串,也就是把dellist替换为标准输入读取的字符串

2020-05-18
发表者 Venus
xargs清空文件已关闭评论
#目的:
查找指定目录下的日志文件,超过指定大小后就清空
#方法:
find /tmp -size +500M -type f | grep *.log | xargs -I dellist sh -c 'cat /dev/null > dellist'
大部分命令只能在命令行输入参数,不能用管道符传递参数。
xargs命令就是把标准输入做为执行命令的参数。
-I 作用是指定要替换的字符串,也就是把dellist替换为标准输入读取的字符串
2020-05-08
发表者 Venus
mysql导入报@@GLOBAL.GTID_PURGED can only be set when @@GLOBAL.GTID_EXECUTED is empty错误已关闭评论
从阿里云mysqldump的sql文件导入本地库报错
[root@localhost ~]# mysql -uroot -p$(cat mysql_password.txt) xxx < /home/backup/xxx/xxx2020-05-07-04-00-01.sql
mysql: [Warning] Using a password on the command line interface can be insecure.
ERROR 1840 (HY000) at line 24: @@GLOBAL.GTID_PURGED can only be set when @@GLOBAL.GTID_EXECUTED is empty.
原因是阿里云rds自带主从复制,开启了gtid全局事务id用于保证主从复制一致,备份的时候没有忽略gtid,导致导入本地时报错。
方法1、
# 查看当前的gtid
mysql> select @@global.gtid_executed\G;

# 清空本地的gtid
mysql> reset master;
Query OK, 0 rows affected (0.04 sec)
方法2、删掉sql文件中的 SET @@GLOBAL.GTID_PURGED 2行
-- MySQL dump 10.13  Distrib 5.7.17, for linux-glibc2.5 (x86_64)
--
-- Host: rm-xxx.mysql.rds.aliyuncs.com    Database: xxx
-- ------------------------------------------------------
-- Server version       5.7.25-log

/*!40101 SET @OLD_CHARACTER_SET_CLIENT=@@CHARACTER_SET_CLIENT */;
/*!40101 SET @OLD_CHARACTER_SET_RESULTS=@@CHARACTER_SET_RESULTS */;
/*!40101 SET @OLD_COLLATION_CONNECTION=@@COLLATION_CONNECTION */;
/*!40101 SET NAMES utf8 */;
/*!40103 SET @OLD_TIME_ZONE=@@TIME_ZONE */;
/*!40103 SET TIME_ZONE='+00:00' */;
/*!40014 SET @OLD_UNIQUE_CHECKS=@@UNIQUE_CHECKS, UNIQUE_CHECKS=0 */;
/*!40014 SET @OLD_FOREIGN_KEY_CHECKS=@@FOREIGN_KEY_CHECKS, FOREIGN_KEY_CHECKS=0 */;
/*!40101 SET @OLD_SQL_MODE=@@SQL_MODE, SQL_MODE='NO_AUTO_VALUE_ON_ZERO' */;
/*!40111 SET @OLD_SQL_NOTES=@@SQL_NOTES, SQL_NOTES=0 */;
SET @MYSQLDUMP_TEMP_LOG_BIN = @@SESSION.SQL_LOG_BIN;
SET @@SESSION.SQL_LOG_BIN= 0;

--
-- GTID state at the beginning of the backup
--

SET @@GLOBAL.GTID_PURGED='6822560b-3659-11e8-afba-7cd30adaf22a:1-33310212,
79abd425-3659-11e8-8eeb-7cd30adaf28e:1-36989543';
方法3、
/usr/local/mysql/bin/mysqldump --set-gtid-purged=OFF
加上--set-gtid-purged=OFF参数再备份,这样就忽略。
2020-05-07
发表者 Venus
filebeat7.6.1修改索引名字后elasticsearch中没有生成新索引已关闭评论
filebeat7.6.1修改索引名字后,比如下面这样,shop-api xxx
output.elasticsearch:
  hosts: ["http://192.168.0.10:9200"]
  index: "shop-api-%{[agent.version]}-%{+yyyy.MM.dd}"
setup.template.name: "shop-api"
setup.template.pattern: "shop-api-*"
启动后,发现在es中并没有生成新的索引。
filebeat有打印下面的日志信息
2020-05-07T02:40:53.010Z	INFO	[index-management]	idxmgmt/std.go:258	Auto ILM enable success.
2020-05-07T02:40:53.012Z	INFO	[index-management.ilm]	ilm/std.go:139	do not generate ilm policy: exists=true, overwrite=false
2020-05-07T02:40:53.012Z	INFO	[index-management]	idxmgmt/std.go:271	ILM policy successfully loaded.
2020-05-07T02:40:53.012Z	INFO	[index-management]	idxmgmt/std.go:410	Set setup.template.name to '{filebeat-7.6.1 {now/d}-000001}' as ILM is enabled.
提示开启了ILM策略
翻官方文档(https://www.elastic.co/guide/en/beats/filebeat/current/elasticsearch-output.html)后发现:
index配置部分中提示 The index setting is ignored when index lifecycle management is enabled
意思就是index设置的参数在索引生命周期管理(ilm)开启后会忽略。
查看ilm文档 https://www.elastic.co/guide/en/beats/filebeat/current/ilm.html 提示:
Starting with version 7.0, Filebeat uses index lifecycle management by default when it connects to a cluster that supports lifecycle management
从7.0版本开始,当elasticsearch支持生命周期管理时,filebeat默认使用索引生命周期管理,这样就导致自己修改的日志文件名无效了。
关闭ilm功能即可(setup.ilm.enabled: false)。
[root@node1 shop-api]# cat filebeat.yml
filebeat.inputs:
- type: log
  paths:
   - /mnt/logs/*.log
  fields:
   java: true
  fields_under_root: true
  multiline.pattern: '^[0-9]{2}:[0-9]{2}:[0-9]{2}.* \[http-nio'
  multiline.negate: true
  multiline.match: after

setup.ilm.enabled: false
output.elasticsearch:
  hosts: ["http://192.168.0.10:9200"]
  index: "shop-api-%{[agent.version]}-%{+yyyy.MM.dd}"
setup.template.name: "shop-api"
setup.template.pattern: "shop-api-*"
2020-04-30
发表者 Venus
nginx http重定向到https,post数据丢失。已关闭评论
nginx配置http跳转https
if ($scheme = http) {
	return 301 https://$host$request_uri;
}
如果状态码返回301或者302,当post数据到http协议时,重定向后会出现请求方法变为 get,post数据丢失。
解决这个问题就要换返回的状态码。
if ($scheme = http) {
	return 307 https://$host$request_uri;
}
307、308 都可以保持post数据的重定向,包括请求方法也不会变化。
307是临时,308是永久
所以当往一个http地址发送post请求,服务器重定向到https,要配置为307或者308状态码。
2020-04-29
发表者 Venus
阿里云ecs服务器arp映射表与实际mac地址不一致的疑问已关闭评论
最近在排查k8s问题的时候发现arp表中的mac地址和实际的mac地址不一致。但还能通信,这就很疑惑了。(以前也没注意过这个mac地址)
几台服务器都在在同一个可用区、同一个网络同一个安全组下。
# 服务器1
内网IP:172.19.34.91
[root@iZuf60rpsu8z9v5nzviztlZ ~]# ping 172.19.34.89 # ping 服务器2
PING 172.19.34.89 (172.19.34.89) 56(84) bytes of data.
64 bytes from 172.19.34.89: icmp_seq=1 ttl=64 time=0.208 ms
# 查看服务器1的arp
[root@iZuf60rpsu8z9v5nzviztlZ ~]# arp -e
Address                  HWtype  HWaddress           Flags Mask            Iface
172.17.0.9               ether   02:42:ac:11:00:09   C                     docker0
172.19.34.89             ether   ee:ff:ff:ff:ff:ff   C                     eth0
通过arp -e查看arp表,172.19.34.89 ip的mac地址为 ee:ff:ff:ff:ff:ff
# 服务器2
[root@iZuf60rpsu8z9v5nzviztmZ ~]# ifconfig
eth0: flags=4163<UP,BROADCAST,RUNNING,MULTICAST>  mtu 1500
        inet 172.19.34.89  netmask 255.255.240.0  broadcast 172.19.47.255
        ether 00:16:3e:0e:36:60  txqueuelen 1000  (Ethernet)
        RX packets 1248357423  bytes 321629365565 (299.5 GiB)
        RX errors 0  dropped 0  overruns 0  frame 0
        TX packets 794943098  bytes 186700299960 (173.8 GiB)
        TX errors 0  dropped 0 overruns 0  carrier 0  collisions 0
服务器2通过ifconfig查看到的mac地址为 00:16:3e:0e:36:60
为何服务器1上arp表中服务器2的mac地址和实际的eth0网卡的mac地址不一致?
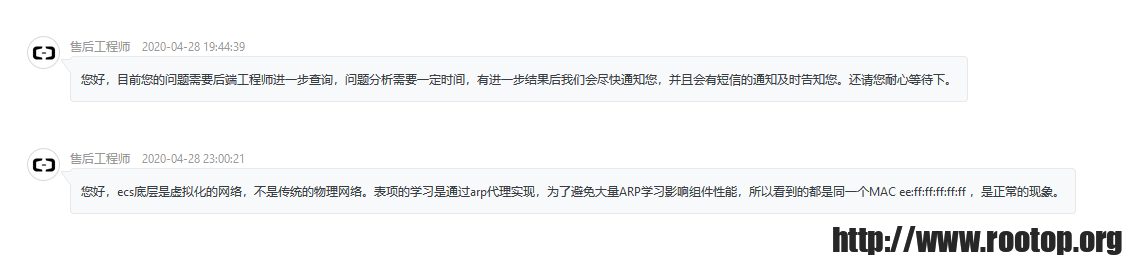
发工单后回答说:
ecs底层是虚拟化的网络,不是传统的物理网络。表项的学习是通过arp代理实现,为了避免大量ARP学习影响组件性能,所以看到的都是同一个MAC ee:ff:ff:ff:ff:ff ,是正常的现象。
同样一个问题,腾讯云回答并没有很直观的得到答案(也不知道是不是我表述有问题)。
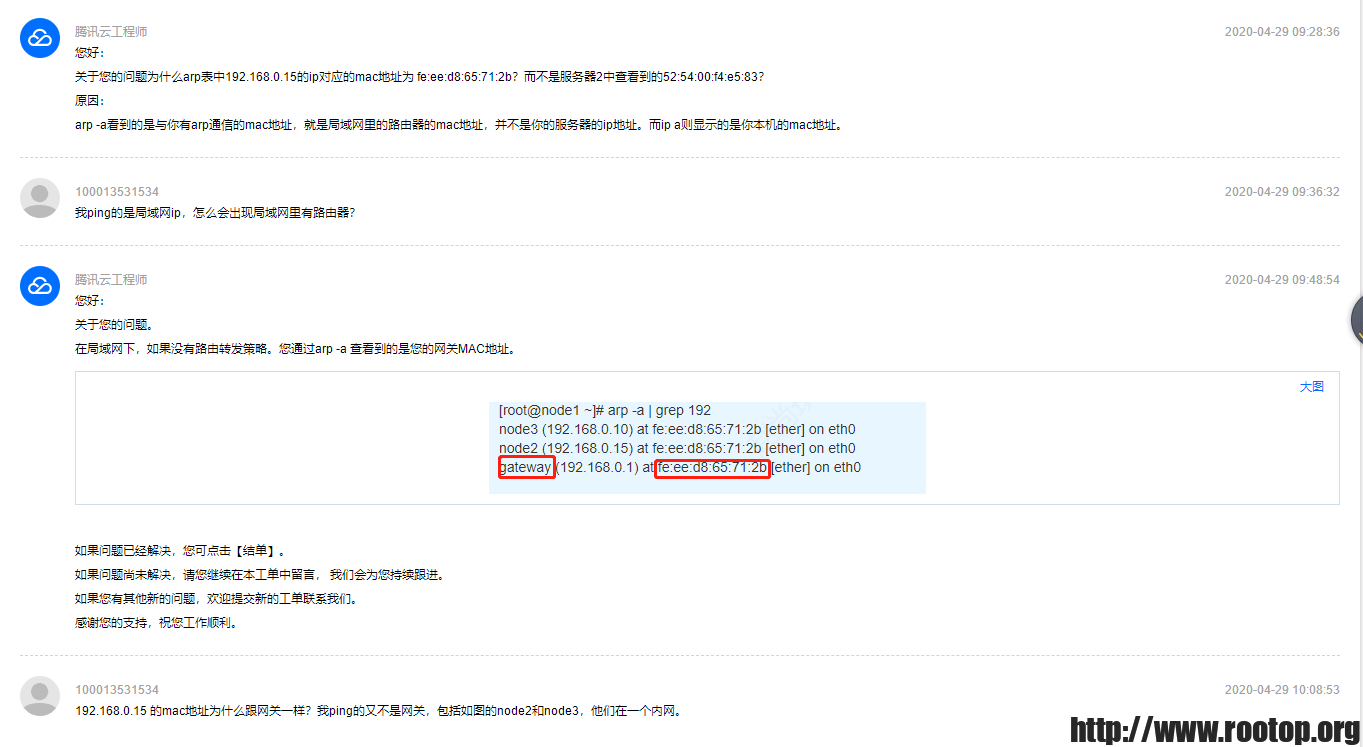
再后来腾讯云客服回了个电话也只是说虚拟化架构的问题,并不影响使用。