Rootop 服务器运维与web架构

2016-02-16
发表者 Venus
Linux cp 实现强行覆盖已关闭评论

Linux cp 实现强行覆盖

原文:http://blog.chinaunix.net/uid-223060-id-2215407.html

发现在Fedora 10 /ubutun 里面用cp -fr src dest,即使加了-f也是不能强行覆盖的,这时怎么回事的呢?一两个文件还好说,就输几个yes吧,但是要是n多文件怎么办?下面提供三种解决办法。

方法一

我们输入alias命令,看看系统给cp起了一个什么别名。

[root@localhost ~]# alias
alias cp=’cp -i’
alias l.=’ls -d .* –color=auto’
alias ll=’ls -l –color=auto’
alias ls=’ls –color=auto’
alias mv=’mv -i’
alias rm=’rm -i’
alias which=’alias | /usr/bin/which –tty-only –read-alias –show-dot –show-tilde’

然后[root@localhost ~]# man cp
看看-i什么意思
-i, –interactive   prompt before overwrite
原来在覆盖之前会提示,那我们的解决办法也出来了,用unalias cp来解除cp的别名,还原纯净的cp。
[root@localhost ~]#unaslias cp   (这只是临时取消cp的别名,不是永久的)
[root@localhost ~]#cp -fr src dest       这下就行了,就不会提示覆盖了。

方法二

输入\cp命令,作用也是取消cp的别名。
[root@localhost ~]#\cp -fr src dest

方法三

输入yes|cp -fr src dest,使用管道自动输入yes。
[root@localhost ~]#yes | cp cp -fr src dest   让管道自动输入一大堆得yes,就可以完成了强行复制了。
那有人会问dos的copy命令怎么实现强行复制的呢?答案是
用来 xcopy /y src dest 来实现强行复制。

2016-02-16
发表者 Venus
centos7下编译安装libiconv-1.14 error: ‘gets’ undeclared here (not in a function)已关闭评论

centos7下编译安装libiconv-1.14 error: ‘gets’ undeclared here (not in a function)

centos7下编译安装libiconv-1.14报错,信息如下:

In file included from progname.c:26:0:
./stdio.h:1010:1: error: ‘gets’ undeclared here (not in a function)
 _GL_WARN_ON_USE (gets, "gets is a security hole - use fgets instead");
 ^
make[1]: *** [progname.o] Error 1
make[1]: Leaving directory `/root/lnmp1.2/source/libiconv-1.14/srclib'
make: *** [all] Error 2

解决方法:
编辑 libiconv-1.14/srclib/stdio.h 文件,这个文件在make之后才会生成,源码中是没有的。

1007 /* It is very rare that the developer ever has full control of stdin,
1008 so any use of gets warrants an unconditional warning. Assume it is
1009 always declared, since it is required by C89. */
1010 _GL_WARN_ON_USE (gets, "gets is a security hole - use fgets instead");

第1010行,把 _GL_WARN_ON_USE (gets, “gets is a security hole – use fgets instead”); 删掉
改为:

#if defined(__GLIBC__) && !defined(__UCLIBC__) && !__GLIBC_PREREQ(2, 16)
_GL_WARN_ON_USE (gets, "gets is a security hole - use fgets instead");
#endif

变成如下:

继续make && make install 通过

2016-02-15
发表者 Venus
在Linux中让echo命令显示带颜色的字已关闭评论

在Linux中让echo命令显示带颜色的字

原文来自:http://onlyzq.blog.51cto.com/1228/546459

echo显示带颜色,需要使用参数-e
格式如下:
echo -e “\033[字背景颜色;文字颜色m字符串\033[0m”
例如:
echo -e “\033[41;37m TonyZhang \033[0m”
其中41的位置代表底色, 37的位置是代表字的颜色

注:
1、字背景颜色和文字颜色之间是英文的“”””
2、文字颜色后面有个m
3、字符串前后可以没有空格,如果有的话,输出也是同样有空格

下面看几个例子:

echo -e “\033[30m 黑色字 \033[0m”
echo -e “\033[31m 红色字 \033[0m”
echo -e “\033[32m 绿色字 \033[0m”
echo -e “\033[33m 黄色字 \033[0m”
echo -e “\033[34m 蓝色字 \033[0m”
echo -e “\033[35m 紫色字 \033[0m”
echo -e “\033[36m 天蓝字 \033[0m”
echo -e “\033[37m 白色字 \033[0m”
echo -e “\033[40;37m 黑底白字 \033[0m”
echo -e “\033[41;37m 红底白字 \033[0m”
echo -e “\033[42;37m 绿底白字 \033[0m”
echo -e “\033[43;37m 黄底白字 \033[0m”
echo -e “\033[44;37m 蓝底白字 \033[0m”
echo -e “\033[45;37m 紫底白字 \033[0m”
echo -e “\033[46;37m 天蓝底白字 \033[0m”
echo -e “\033[47;30m 白底黑字 \033[0m”

控制选项说明 :

\33[0m 关闭所有属性
\33[1m 设置高亮度
\33[4m 下划线
\33[5m 闪烁
\33[7m 反显
\33[8m 消隐
\33[30m — \33[37m 设置前景色
\33[40m — \33[47m 设置背景色
\33[nA 光标上移n行
\33[nB 光标下移n行
\33[nC 光标右移n行
\33[nD 光标左移n行
\33[y;xH设置光标位置
\33[2J 清屏
\33[K 清除从光标到行尾的内容
\33[s 保存光标位置
\33[u 恢复光标位置
\33[?25l 隐藏光标
\33[?25h 显示光标

2016-02-14
发表者 Venus
利用wkhtmltopdf把html转换为pdf或jpg已关闭评论

利用wkhtmltopdf把html转换为pdf或jpg

系统:centos6 x64

官方网站: http://wkhtmltopdf.org
What is it?
wkhtmltopdf and wkhtmltoimage are open source (LGPLv3) command line tools to render HTML into PDF and various image formats using the Qt WebKit rendering engine.
These run entirely “headless” and do not require a display or display service.

安装:

[root@www ~]# wget -c http://download.gna.org/wkhtmltopdf/0.12/0.12.3/wkhtmltox-0.12.3_linux-generic-amd64.tar.xz
[root@www ~]# yum install -y xz*
[root@www ~]# xz -d wkhtmltox-0.12.3_linux-generic-amd64.tar.xz
[root@www ~]# tar xvf wkhtmltox-0.12.3_linux-generic-amd64.tar
[root@www ~]# cp -R wkhtmltox /usr/local/

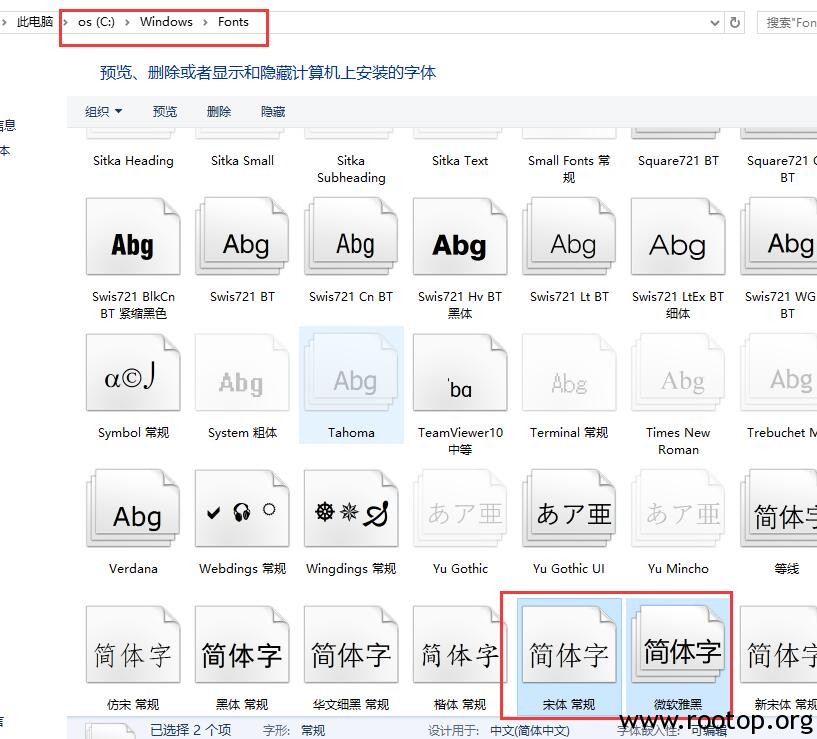
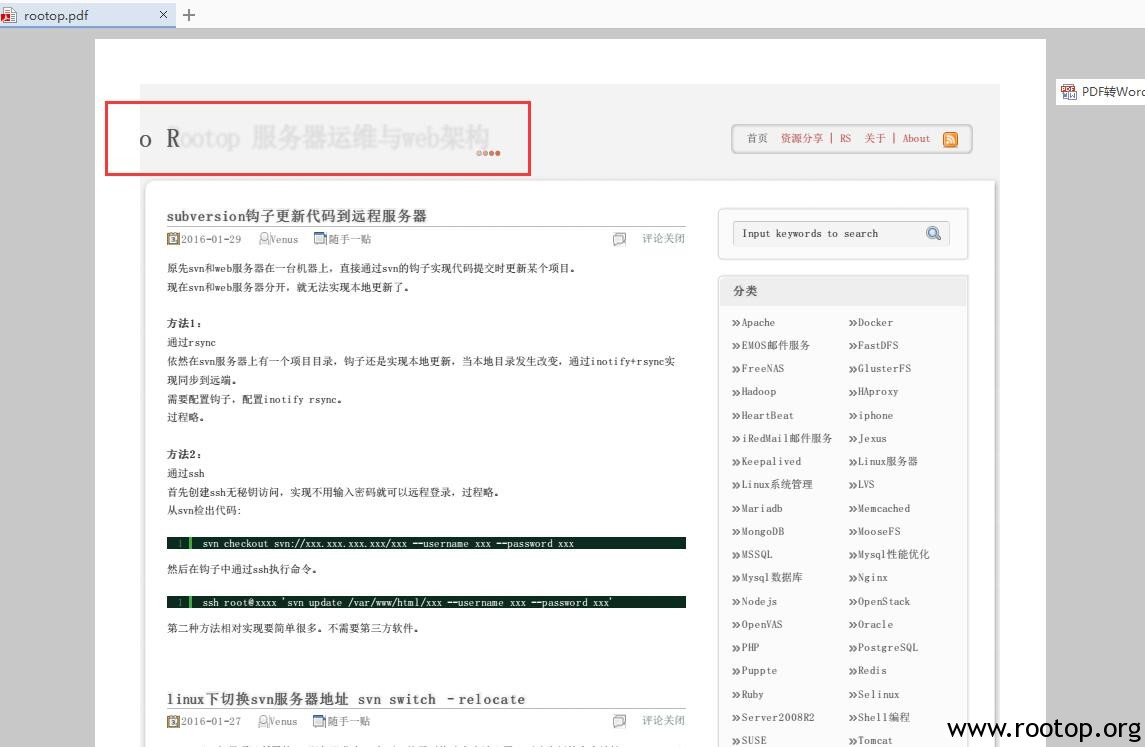
拷贝windows字体文件到linux中,否则生成pdf或图像会显示方框乱码。
把C:\Windows\Fonts下的 “微软雅黑”或”宋体 常规”(一个就行) 上传到linux下的/usr/share/fonts

[root@www ~]# cp msyh.ttc simsun.ttc /usr/share/fonts

生成pdf:

[root@www ~]# /usr/local/wkhtmltox/bin/wkhtmltopdf https://www.rootop.org ~/rootop.pdf

生成jpg:

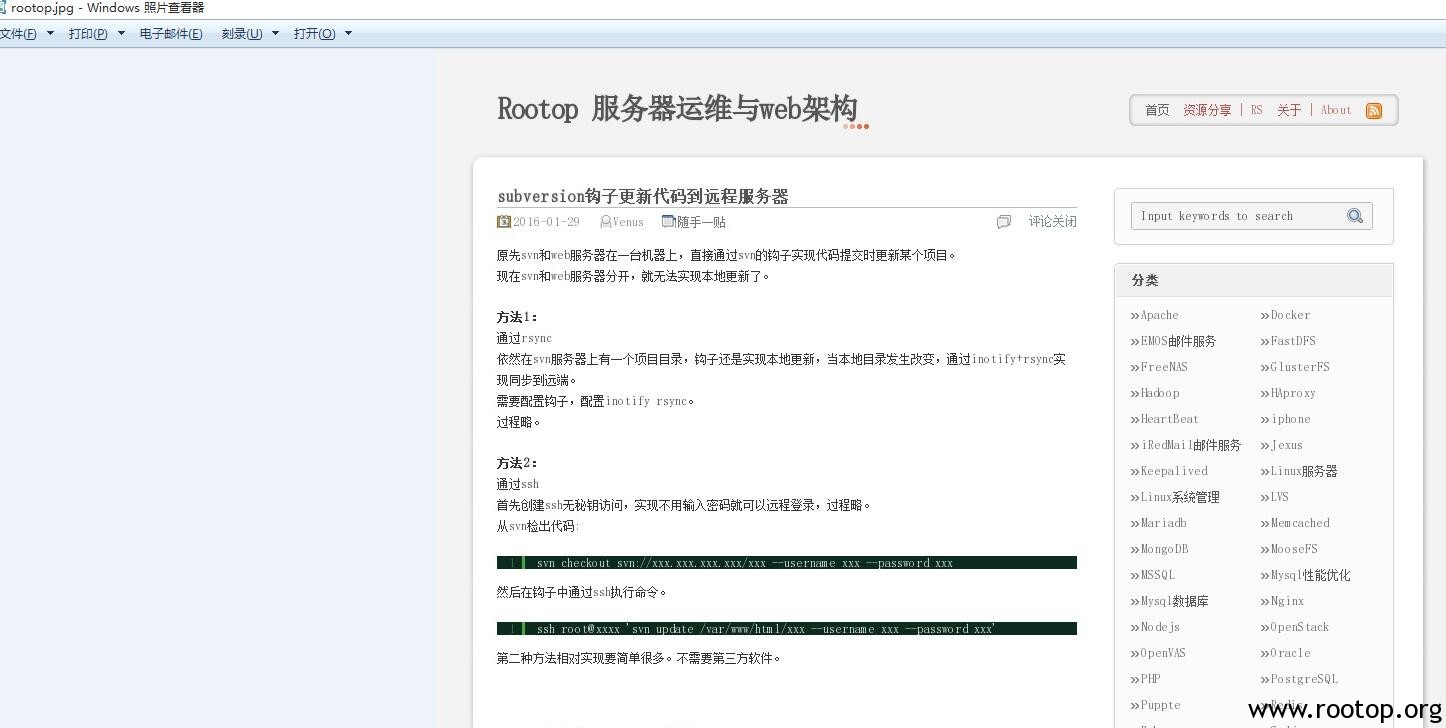
[root@www ~]# /usr/local/wkhtmltox/bin/wkhtmltoimage https://www.rootop.org ~/rootop.jpg

2016-01-29
发表者 Venus
subversion钩子更新代码到远程服务器已关闭评论

subversion钩子更新代码到远程服务器

原先svn和web服务器在一台机器上,直接通过svn的钩子实现代码提交时更新某个项目。
现在svn和web服务器分开,就无法实现本地更新了。

方法1:
通过rsync
依然在svn服务器上有一个项目目录,钩子还是实现本地更新,当本地目录发生改变,通过inotify+rsync实现同步到远端。
需要配置钩子,配置inotify rsync。
过程略。

方法2:
通过ssh
首先创建ssh无秘钥访问,实现不用输入密码就可以远程登录,过程略。
从svn检出代码:

svn checkout svn://xxx.xxx.xxx.xxx/xxx --username xxx --password xxx

然后在钩子中通过ssh执行命令。

ssh root@xxxx 'svn update /var/www/html/xxx --username xxx --password xxx'

第二种方法相对实现要简单很多。不需要第三方软件。