hls是基于http协议的流媒体,在移动端中可以直接播放,测试包括QQ,安卓下的chrome、安卓下的搜狗浏览器都可以直接播放m3u8视频。
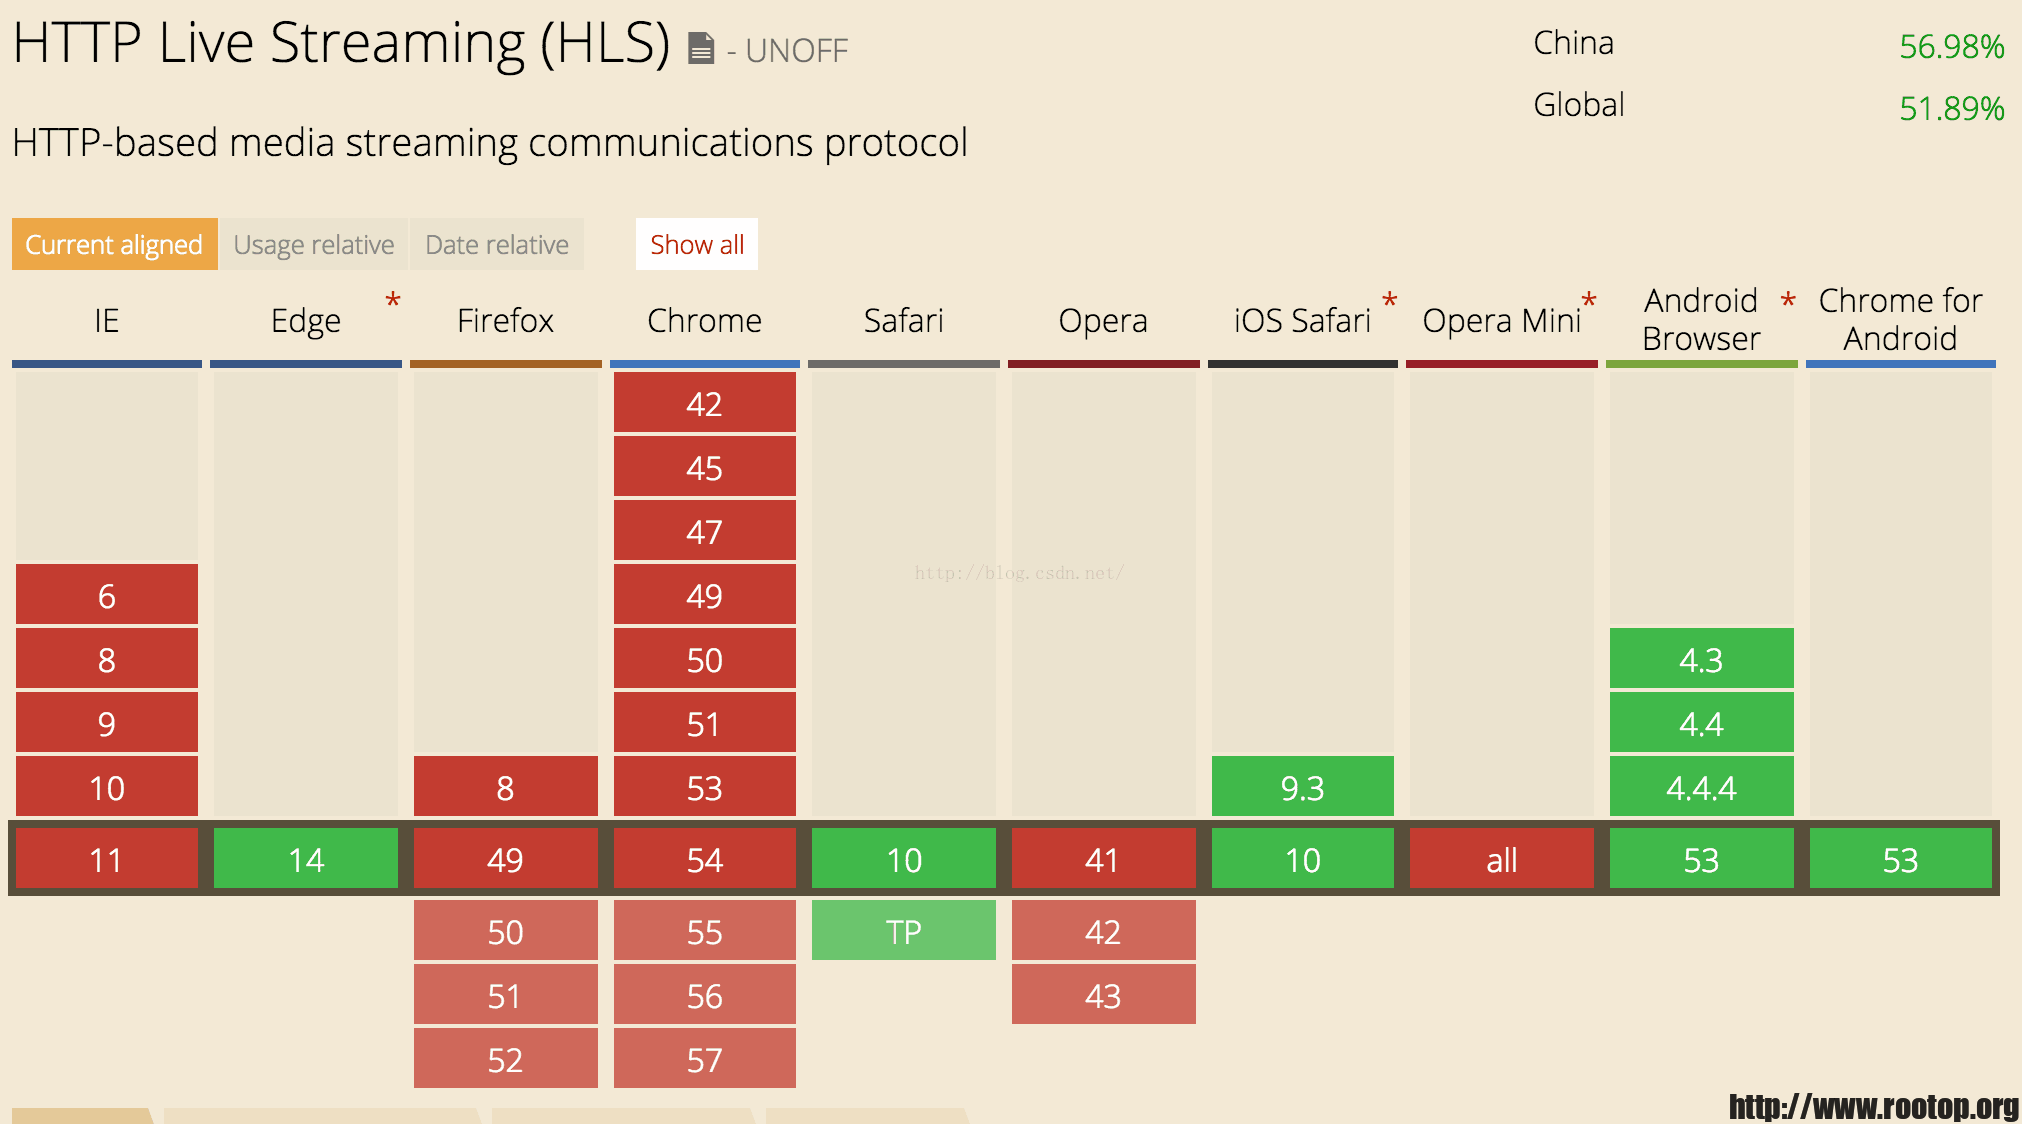
但是接到反馈,另一台机器上的m3u8在移动端访问变成下载,而不是直接播放。
通过查看返回的响应头中content-type 为 application/octet-stream
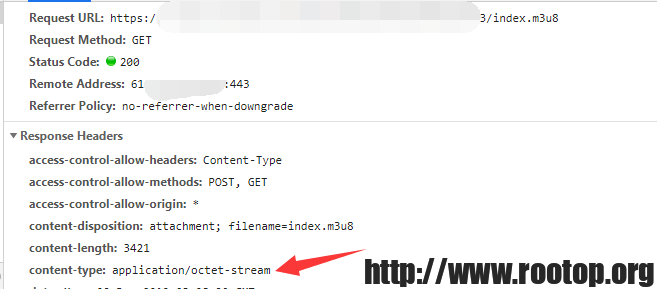
这是mime中默认的,在找不到相对应的content-type时,nginx会返回默认的content-type类型。
正常来说需要返回application/vnd.apple.mpegurl才是正确的。这样才能支持移动端直接播放。
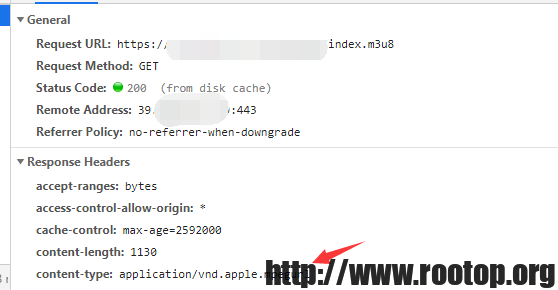
这里加了个location,再添加个文件类型
location /hls
{
	add_header 'Access-Control-Allow-Origin' '*';
	add_header 'Access-Control-Allow-Credentials' 'true';
	add_header 'Access-Control-Allow-Methods' 'GET';
	add_header 'Cache-Control' 'no-cache';

	types
	{
		application/vnd.apple.mpegurl m3u8;
		video/mp2t ts;
	}
}
mime介绍:
MIME(Multipurpose Internet Mail Extensions)多用途互联网邮件扩展类型。是设定某种扩展名的文件用一种应用程序来打开的方式类型,当该扩展名文件被访问的时候,浏览器会自动使用指定应用程序来打开。
服务器(nginx)会根据客户端请求的资源文件扩展名,然后去对照mime.types文件找对应的content-type,在响应头中返回给客户端。
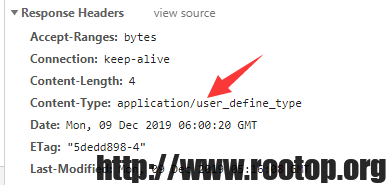
自己添加一条mime测试一下。
root@rootop:/home/software/openresty/nginx/conf# vi mime.types
types {
	· 略过已有配置
	application/user_define_type		     rootop;
}
在网站根目录下创建一个1.rootop文件,浏览器访问,查看响应头。