redhat中自带subversion,yum安装即可:
[root@rhel ~]# yum install -y subversion
创建仓库,存放配置文件及代码:
[root@rhel ~]# mkdir /mnt/svn
生成仓库信息:
[root@rhel ~]# svnadmin create /mnt/svn/
[root@rhel ~]# cd /mnt/svn/
[root@rhel svn]# ll -a
总计 72
drwxr-xr-x 7 root root 4096 08-27 10:20 .
drwxr-xr-x 4 root root 4096 08-27 10:19 ..
drwxr-xr-x 2 root root 4096 08-27 10:20 conf
drwxr-xr-x 2 root root 4096 08-27 10:20 dav
drwxr-sr-x 5 root root 4096 08-27 10:20 db
-r–r–r– 1 root root 2 08-27 10:20 format
drwxr-xr-x 2 root root 4096 08-27 10:20 hooks
drwxr-xr-x 2 root root 4096 08-27 10:20 locks
-rw-r–r– 1 root root 229 08-27 10:20 README.txt
会看到conf文件夹,存放配置文件,db文件夹存放代码,代码以数据库文件类型保存,而不是以源码树方式保存。
首先配置svnserve.conf:
anon-access = none //改为none
auth-access = write //默认,去掉前面注释
password-db = passwd //认证文件
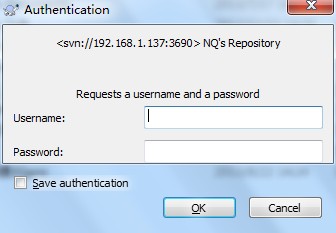
authz-db = authz //权限设置realm = NQ’s Repository //登陆时的提示信息
保存退出,编辑passwd文件,添加用户:
[users]
# harry = harryssecret
# sally = sallyssecret
nq = networkquestions //用户名+密码
保存退出,编辑authz:
[groups]
# harry_and_sally = harry,sally
# [/foo/bar]
# harry = rw
# * =
# [repository:/baz/fuz]
# @harry_and_sally = rw
# * = r
[/]
nq = rw //nq 对根目录有读写权限
启动svn:
[root@rhel conf]# svnserve -d -r /mnt/svn/ // -d 启动守护进程,占用tcp协议的3690端口 -r 以/mnt/svn做为根目录
[root@rhel conf]# lsof -i:3690
COMMAND PID USER FD TYPE DEVICE SIZE NODE NAME
svnserve 3428 root 3u IPv6 14097 TCP *:svn (LISTEN)
可以看到已经启动,编辑iptables,开放3690端口:
[root@rhel ~]# vi /etc/sysconfig/iptables
-A RH-Firewall-1-INPUT -p tcp –dport 3690 -j ACCEPT
重启iptables。
客户端配置:
windows下最常用的就是TortoiseSVN这个客户端。安装好后会集成到右键菜单里。
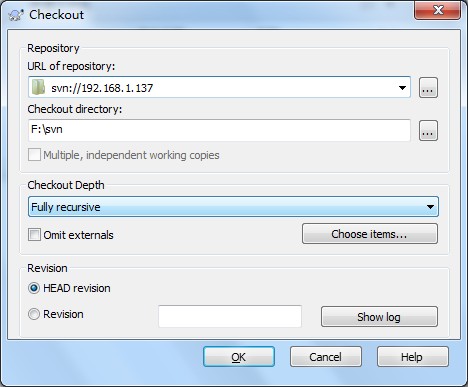
在合理的路径下创建文件夹(svn)存放代码。右键,选择 SVN checkout 检出。
输入svn服务器地址,格式:svn://192.168.1.137
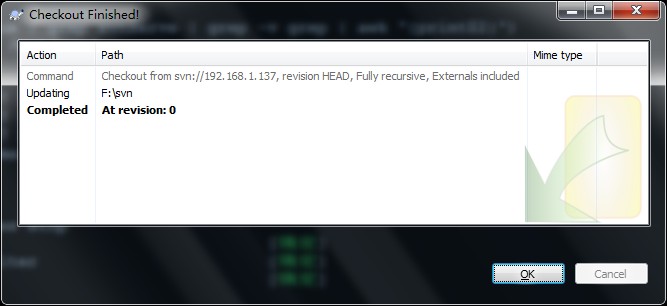
检出成功
![]()
创建的文件夹变为绿色勾

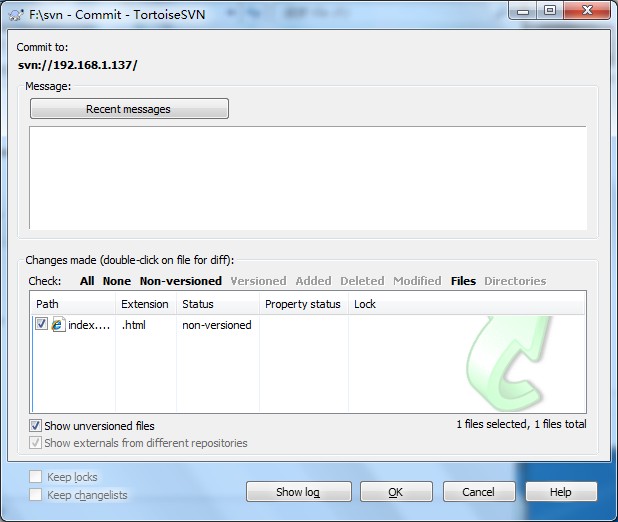
在windows下新建页面,更新到svn服务器中。右键,选择Commit,更新即可。
提交成功。
设置svn更新时自动提交到web目录
在svn库中有个hooks目录,用来触发条件的。
[root@localhost ~]# cd /mnt/svn/hooks/
[root@localhost hooks]# ll
总用量 40
-rwxrwxrwx. 1 root root   94 3月   7 21:18 post-commit
-rw-r--r--. 1 root root 1977 3月   4 22:58 post-commit.tmpl
-rw-r--r--. 1 root root 1638 3月   4 22:58 post-lock.tmpl
-rw-r--r--. 1 root root 2289 3月   4 22:58 post-revprop-change.tmpl
-rw-r--r--. 1 root root 1567 3月   4 22:58 post-unlock.tmpl
-rw-r--r--. 1 root root 3426 3月   4 22:58 pre-commit.tmpl
-rw-r--r--. 1 root root 2410 3月   4 22:58 pre-lock.tmpl
-rw-r--r--. 1 root root 2786 3月   4 22:58 pre-revprop-change.tmpl
-rw-r--r--. 1 root root 2100 3月   4 22:58 pre-unlock.tmpl
-rw-r--r--. 1 root root 2780 3月   4 22:58 start-commit.tmpl
[root@localhost hooks]# cat post-commit   //提交后触发
#!/bin/sh
DEST_DIR=/var/www/html
svn update $DEST_DIR --username nq --password networkquestions
exit
[root@localhost hooks]# chmod 777 post-commit

可以实现客户端commit代码时,提交到svn库中同时提交到web目录。
原创文章,转载请注明。本文链接地址: https://www.rootop.org/pages/1813.html


