官网: http://www.rabbitmq.com/install-rpm.html
目前最新稳定版:rabbitmq-server-3.6.14
下载地址: https://dl.bintray.com/rabbitmq/rabbitmq-server-rpm/rabbitmq-server-3.6.14-1.el7.noarch.rpm
系统版本:centos7.3:
[root@localhost ~]# wget -c https://dl.bintray.com/rabbitmq/rabbitmq-server-rpm/rabbitmq-server-3.6.14-1.el7.noarch.rpm
[root@localhost ~]# rpm -ivh rabbitmq-server-3.6.14-1.el7.noarch.rpm
warning: rabbitmq-server-3.6.14-1.el7.noarch.rpm: Header V4 RSA/SHA512 Signature, key ID 6026dfca: NOKEY
error: Failed dependencies:
erlang >= R16B-03 is needed by rabbitmq-server-3.6.14-1.el7.noarch
socat is needed by rabbitmq-server-3.6.14-1.el7.noarch
安装epel源,否则可能没有erlang的包
[root@localhost ~]# yum install -y epel-*
[root@localhost ~]# yum install -y erlang socat
[root@localhost ~]# rpm -ivh rabbitmq-server-3.6.14-1.el7.noarch.rpm
安装完成。
启动服务:
[root@localhost ~]# rabbitmq-server & # 停止用 rabbitmqctl stop
[root@localhost ~]# netstat -tnlp
Active Internet connections (only servers)
Proto Recv-Q Send-Q Local Address Foreign Address State PID/Program name
tcp 0 0 0.0.0.0:4369 0.0.0.0:* LISTEN 14457/epmd
tcp 0 0 0.0.0.0:22 0.0.0.0:* LISTEN 555/sshd
tcp 0 0 127.0.0.1:25 0.0.0.0:* LISTEN 747/master
tcp 0 0 0.0.0.0:25672 0.0.0.0:* LISTEN 14893/beam.smp
tcp6 0 0 :::4369 :::* LISTEN 14457/epmd
tcp6 0 0 :::22 :::* LISTEN 555/sshd
tcp6 0 0 ::1:25 :::* LISTEN 747/master
tcp6 0 0 :::5672 :::* LISTEN 14893/beam.smp
可以看到 5672 端口启动了,mq的端口。
# 开启rabbitmq的web管理界面
[root@localhost ~]# rabbitmq-plugins enable rabbitmq_management
The following plugins have been enabled:
amqp_client
cowlib
cowboy
rabbitmq_web_dispatch
rabbitmq_management_agent
rabbitmq_management
Applying plugin configuration to rabbit@localhost… started 6 plugins.
[root@localhost ~]# netstat -tnlp
Active Internet connections (only servers)
Proto Recv-Q Send-Q Local Address Foreign Address State PID/Program name
tcp 0 0 0.0.0.0:4369 0.0.0.0:* LISTEN 14457/epmd
tcp 0 0 0.0.0.0:22 0.0.0.0:* LISTEN 555/sshd
tcp 0 0 0.0.0.0:15672 0.0.0.0:* LISTEN 14893/beam.smp
tcp 0 0 127.0.0.1:25 0.0.0.0:* LISTEN 747/master
tcp 0 0 0.0.0.0:25672 0.0.0.0:* LISTEN 14893/beam.smp
tcp6 0 0 :::4369 :::* LISTEN 14457/epmd
tcp6 0 0 :::22 :::* LISTEN 555/sshd
tcp6 0 0 ::1:25 :::* LISTEN 747/master
tcp6 0 0 :::5672 :::* LISTEN 14893/beam.smp
可以看到15672端口启动了(web界面)
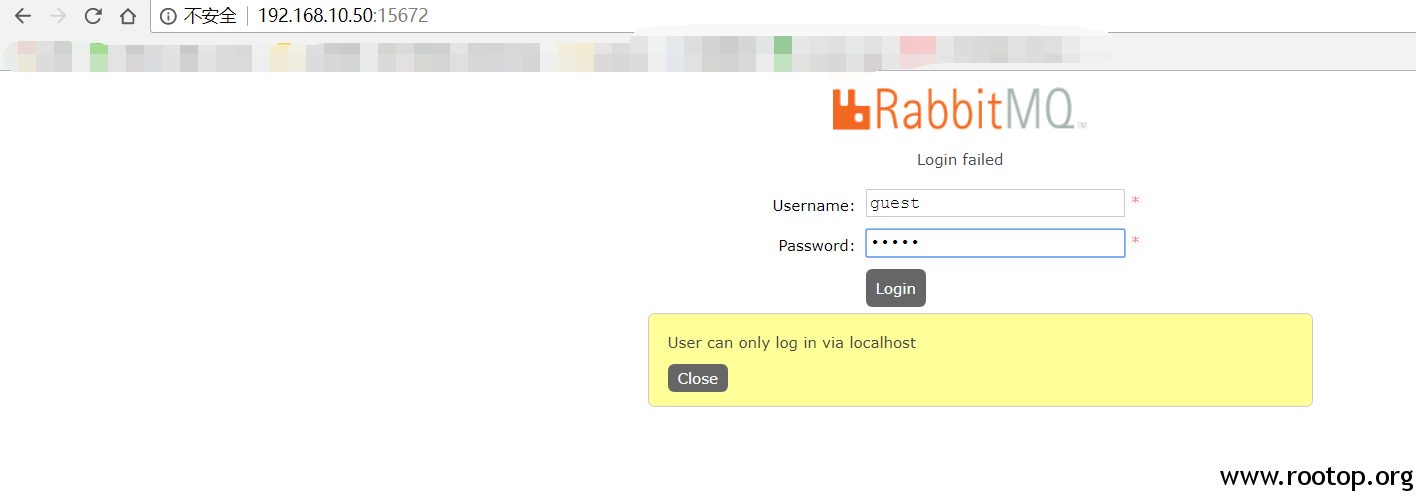
在web登陆的时候,提示 User can only log in via localhost 。如图:
rabbitmq从3.3.0开始禁止使用guest权限通过除localhost外的访问。
# 允许远程登陆,默认没有这个文件
[root@localhost ~]# vi /etc/rabbitmq/rabbitmq.config
[{rabbit, [{loopback_users, []}]}].
注意后面有个点,重启服务。
原创文章,转载请注明。本文链接地址: https://www.rootop.org/pages/3919.html

